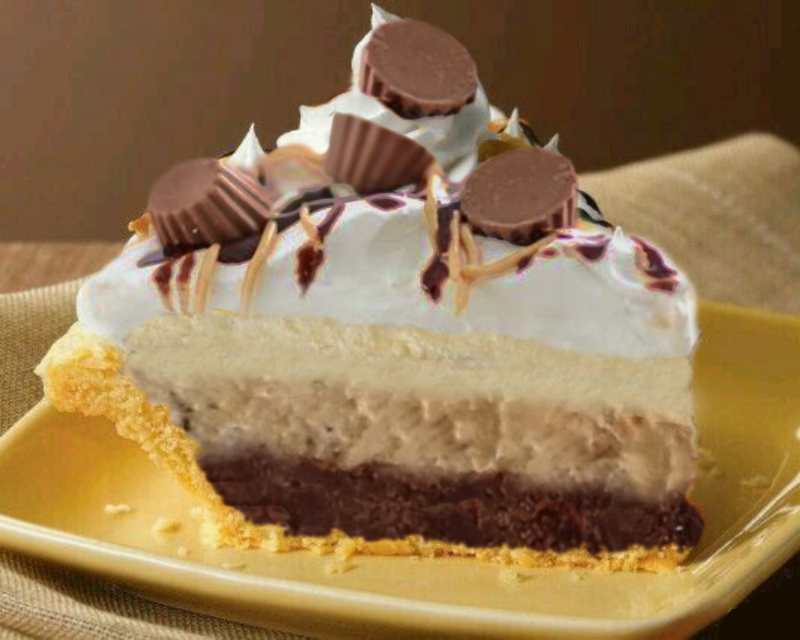
INGREDIENTS:
- 2‐Deep dish pie shells (homemade or frozen) most of the time I do homemade to fit the pie pan I’m using. I’m not a fan of the frozen ones.
I cook these, first brushing a little egg wash (1 egg and a splash of milk thoroughly mixed) on the outer edges of the crust, then sprinkling large decorative sugar crystals on the egg wash. - 1ST LAYER, CHOCOLATE:
- 24‐Ounces Semi‐sweet Chocolate
- 1⅓‐Cups Heavy Whipping Cream
- 4‐TBSP Corn Syrup
- 2‐tsp Vanilla Extract
- 2ND LAYER, PEANUT BUTTER:
- 4‐Cups Powdered Sugar
- 1‐Cup Unsalted Butter, Softened
- 1‐Cup Creamy Peanut Butter
- 4‐tsps Vanilla Plant Milk (or Milk)
- 3RD LAYER, CREAM CHEESE:
- 16‐Ounces Philadelphia Brand Cream Cheese, Softened
- 4‐TBSPs Heavy Whipping Cream
- 8‐TBSPs Sugar
- 16‐Ounces, Thawed, Whipped Topping
- DECORATIVE TOPPING:
- 2 to 3 Cups Heavy Whipping Cream, whipped until stiff peaks form (see recipe for Stabilized Whipped Cream which includes a little unflavored gelatin, water and sugar)
- A Few Caramels, Melted (I just use caramel ice cream topping. It’s a lot easier).
- Milk Chocolate, Melted (I also just use chocolate ice cream topping, same reason).
- Toffee Chips
- Mini Peanut Butter Cups
DIRECTIONS:
CRUSTS:- Prepare crusts (whether using frozen or homemade) using egg wash and sugar.
- I cook mine at 425 degrees until the sugar and egg wash on the outer edges just starts to turn golden. I also use pie weights to keep the crust from bubbling up
- I reccomend cooling these crusts prior to adding the first chocolate layer.
- Put all ingredients except for the heavy whipping cream for this layer into a microwave safe bowl and heat slowly (30 seconds at a time) until chocolate just starts to melt.
- Stir until microwaved ingredients are thoroughly blended. You may have to microwave this a few times to get the ingredients to blend well.
- Then combine all ingredients into an electric mixer (including the heavy whipping cream) and mix until the chocolate is fluffy.
- Spoon into baked pie shells, and spread into layers.
- Refrigerate, covered, for several minutes before adding the next layer.
- Place all ingredients into a large mixing bowl and whip until smooth. (I use an electric mixer).
- Mix well.
- If the mixture is too thick, add more “milk” to the mix, a teaspoon at a time until you get a fluffy consistency. Do not make this too soft or runny as it will not remain firm when chilled and the pies are complete.
- Spread mixture on top of cool, firm, chocolate layers.
- Mix cream cheese, heavy whipping cream and sugar in large bowl with wire whisk (or in a stand mixer) until smooth.
- Once smooth, gently fold in whipped topping with a spatula.
- Carefully spread over the peanut butter layers.
- This can be chilled until you are ready to add the decorative layers.
- Cover both pies with a thin layer of Stabilized Whipped Cream topping.
- Using a large pastry bag (or sandwich‐type bag with corner snipped off), “Pipe” dollops of whipped cream all over pie (I use a star shaped tip, but you can add this as you like).
- Decorate by crisscrossing melted caramel and melted chocolate, then sprinkle liberally with toffee chips.
- Using the pastry bag, again add a large star to what will become each slice of pie (I do 8 or more per pie plus one in the center).
- Add mini peanut butter cups to the final stars of whipped cream, or wherever else you desire.
- Refrigerate for a few hours before serving.
- It is easiest to serve if you use a sharp, clean knife dipped in warm water to cut each slice, cleaning and dipping the knfe between slices. Then it’s just a matter of getting the pie out of the pie plate and onto a serving plate in one piece. Good luck!
Notes:
As you may have noticed, this recipe makes 2 pies
I reworked the recipe to my “Fucking Awesome Pie” because the caramel base can be a little runny and I wanted to add peanut butter and a darker chocolate. Since the first pie was so good, I didn't want to entirely change the recipe.
This recipe is also not as complicated as it looks, but it does take some time to complete.
They aren’t cheap pies to make, but once you taste them, you’ll know why, and you won’t care.